
The react cache component deve
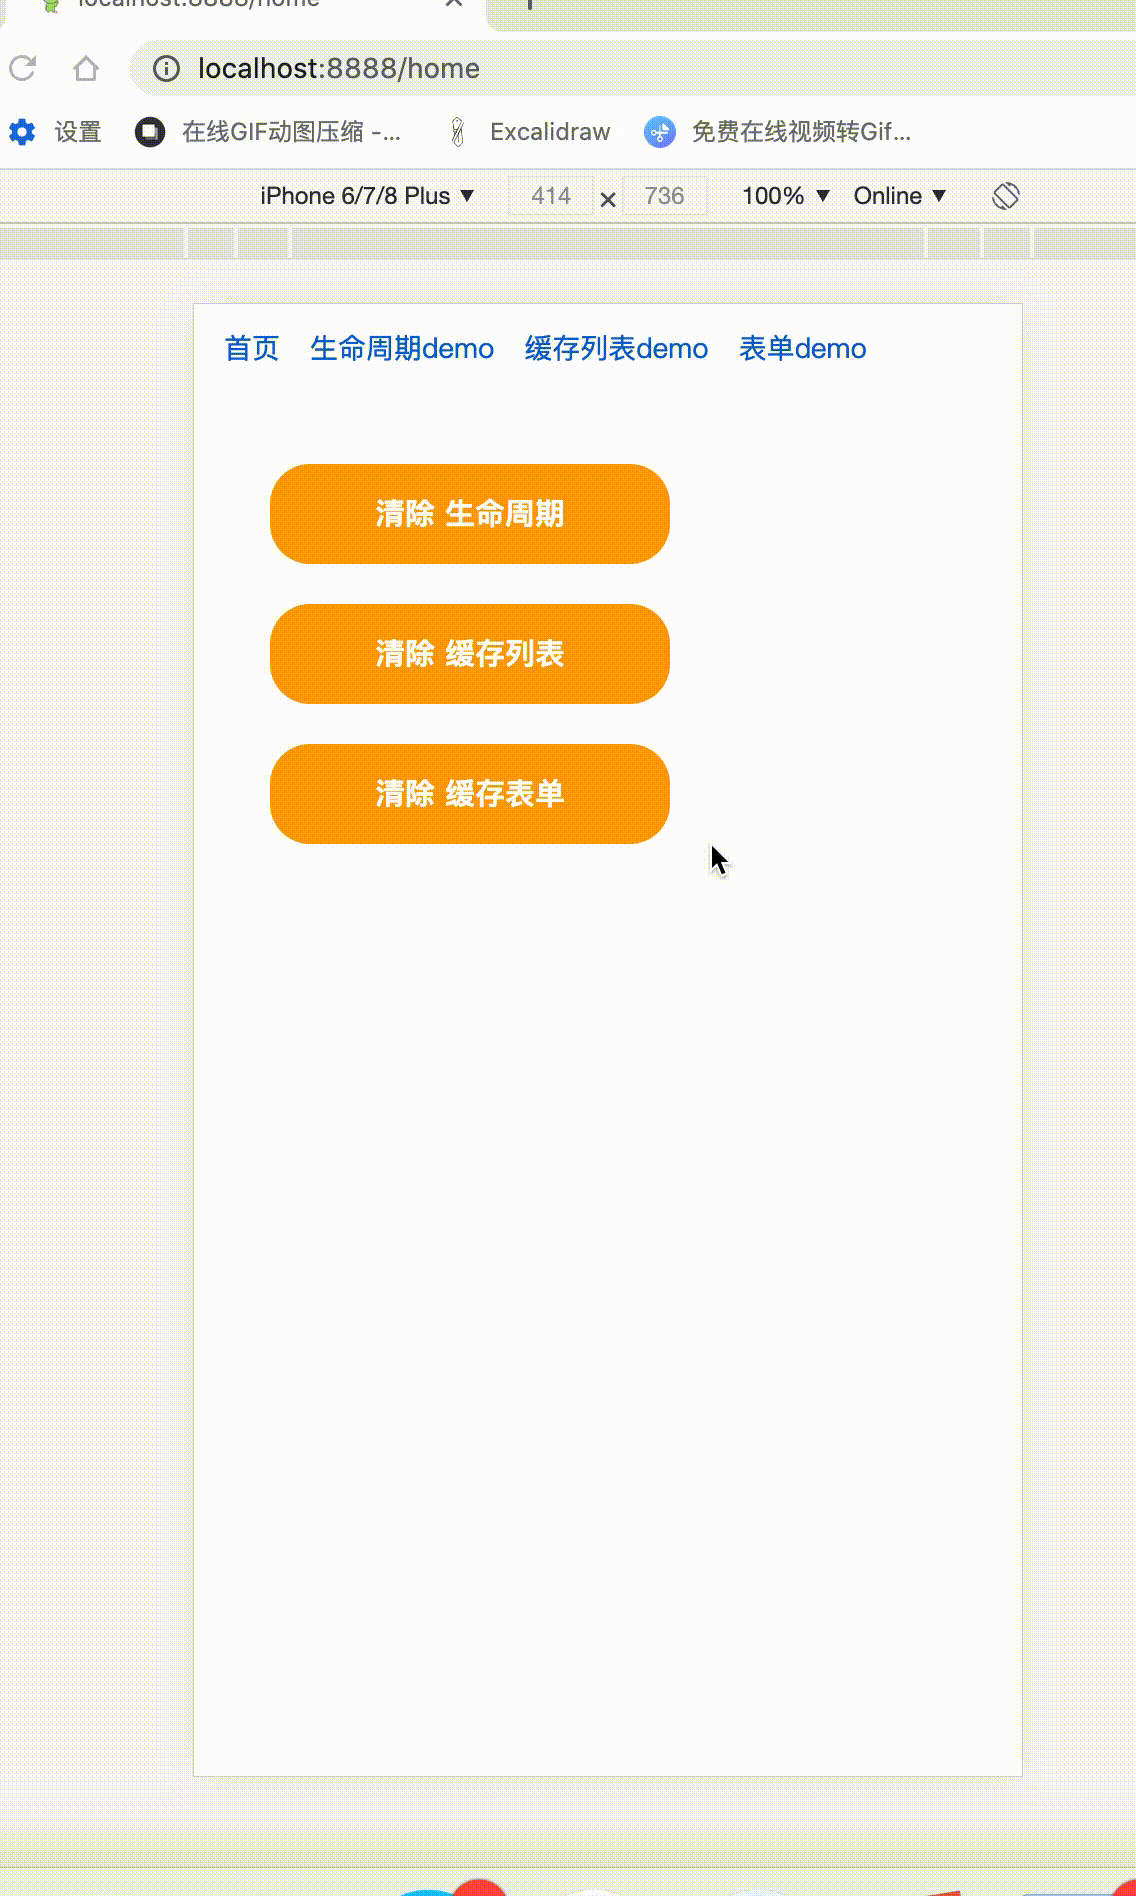
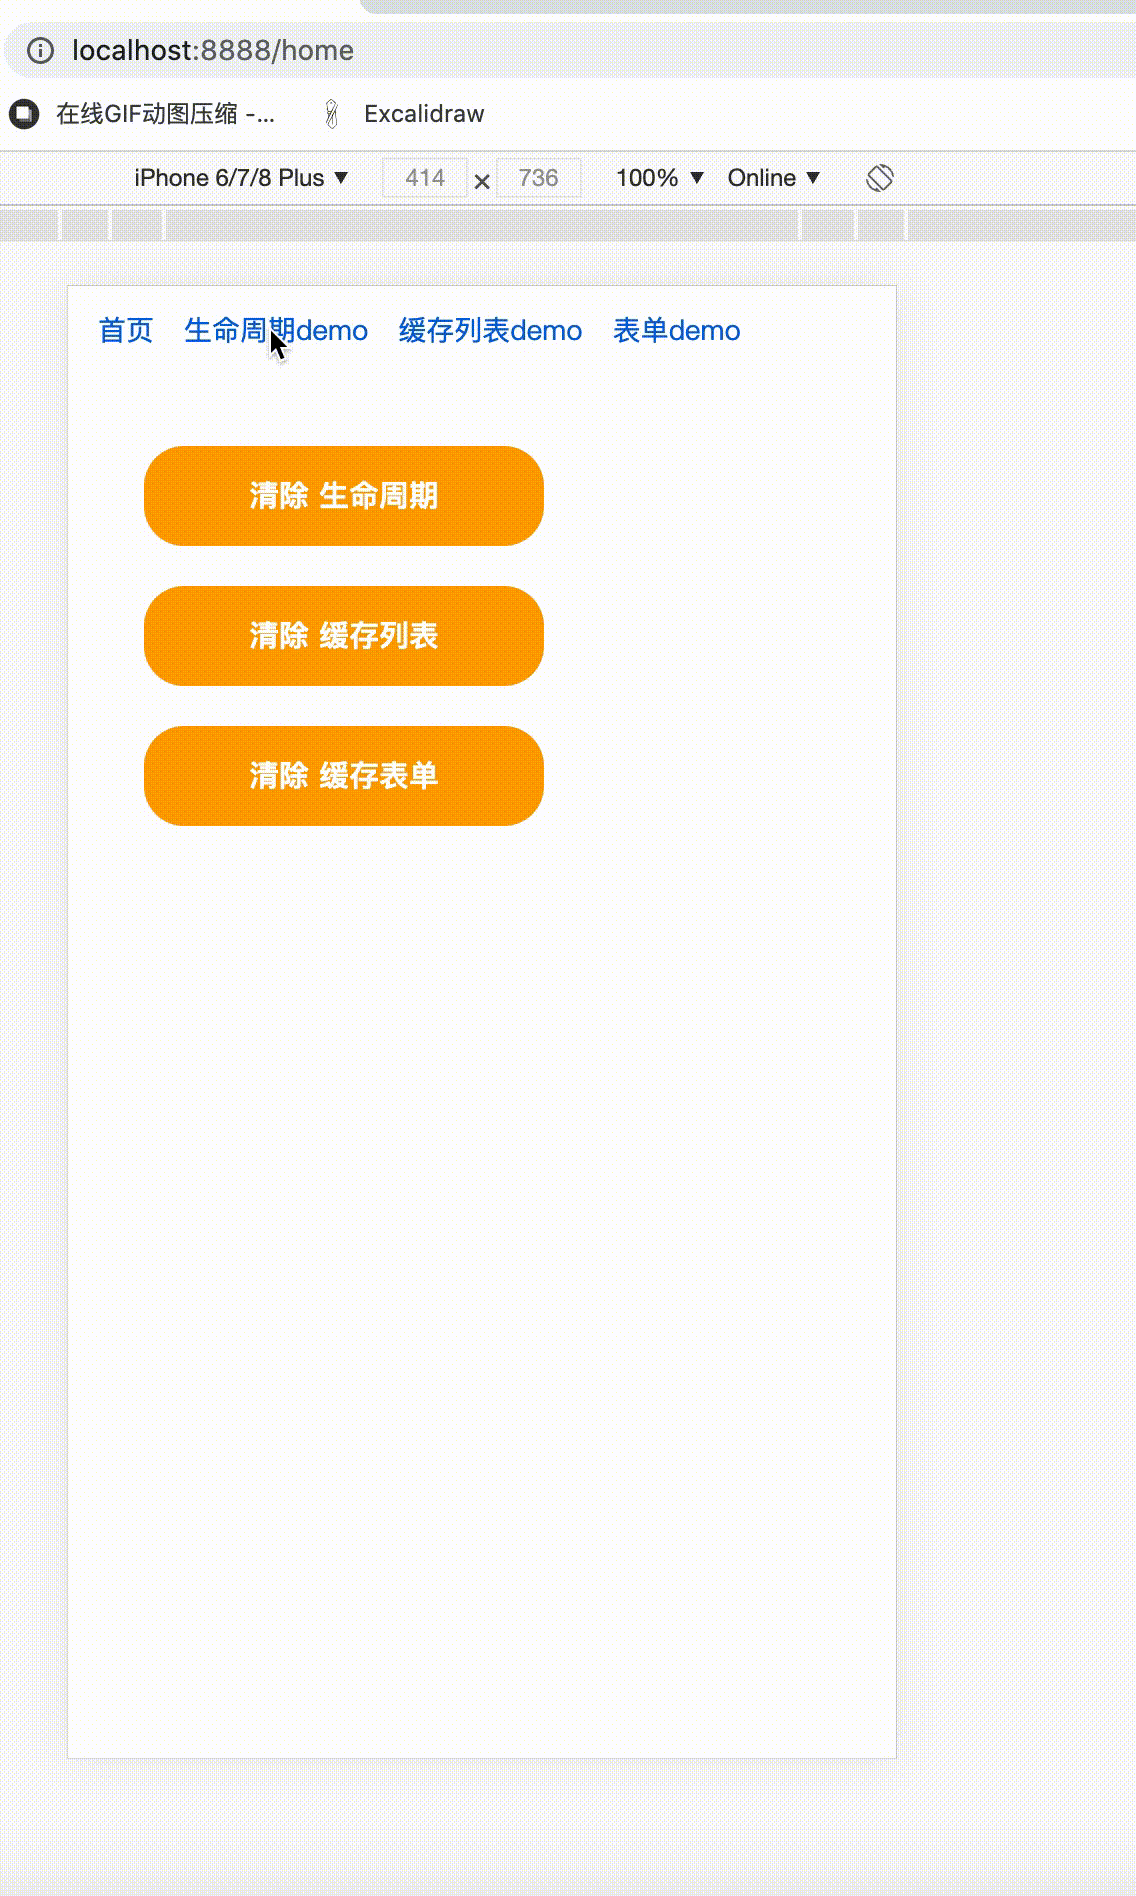
基于react 16.8+ ,react-router 4+ 开发的react缓存组件,可以用于缓存页面组件,类似vue的keepalive包裹vue-router的效果功能。
采用react hooks全新api,支持缓存路由,手动解除缓存,增加了缓存的状态周期,监听函数等。
后续版本会完善其他功能。
demo 缓存组件 + 监听 二 快速上手 下载npm install react-keepalive-router --save # or yarn add react-keepalive-router 使用 1 基本用法 KeepaliveRouterSwitch
KeepaliveRouterSwitch可以理解为常规的Switch,也可以理解为 keepaliveScope,我们确保整个缓存作用域,只有一个 KeepaliveRouterSwitch 就可以了。
import { BrowserRouter as Router, Route, Redirect ,useHistory } from 'react-router-dom' import { KeepaliveRouterSwitch ,KeepaliveRoute ,addKeeperListener } from 'react-keepalive-router' const index = () => { useEffect(()=>{ /* 增加缓存监听器 */ addKeeperListener((history,cacheKey)=>{ if(history)console.log('当前激活状态缓存组件:'+ cacheKey ) }) },[]) return <div > <div > <Router > <Meuns/> <KeepaliveRouterSwitch> <Route path={'/index'} component={Index} ></Route> <Route path={'/list'} component={List} ></Route> { /* 我们将详情页加入缓存 */ } <KeepaliveRoute path={'/detail'} component={ Detail } ></KeepaliveRoute> <Redirect from='/*' to='/index' /> </KeepaliveRouterSwitch> </Router> </div> </div> }
这里应该注意的是对于复杂的路由结构。或者KeepaliveRouterSwitch 包裹的子组件不是Route ,我们要给 KeepaliveRouterSwitch 增加特有的属性 withoutRoute 就可以了。如下例子:
例子一
<KeepaliveRouterSwitch withoutRoute > <div> <Route path="/a" component={ComponentA} /> <Route path="/b" component={ComponentB} /> <KeepaliveRoute path={'/detail'} component={ Detail } ></KeepaliveRoute> </div> </KeepaliveRouterSwitch>
例子二
或者我们可以使用 renderRoutes 等api配合 KeepliveRouterSwitch 使用 。
import {renderRoutes} from "react-router-config" <KeepliveRouterSwitch withoutRoute >{ renderRoutes(routes) }</KeepliveRouterSwitch> KeepaliveRoute
KeepaliveRoute 基本使用和 Route没有任何区别。
在当前版本中如果 KeepaliveRoute 如果没有被 KeepaliveRouterSwitch包裹就会失去缓存作用。
效果
如果我们希望对当前激活的组件,有一些额外的操作,我们可以添加监听器,用来监听缓存组件的激活状态。
addKeeperListener((history,cacheKey)=>{ if(history)console.log('当前激活状态缓存组件:'+ cacheKey ) })
第一个参数未history对象,第二个参数为当前缓存路由的唯一标识cacheKey
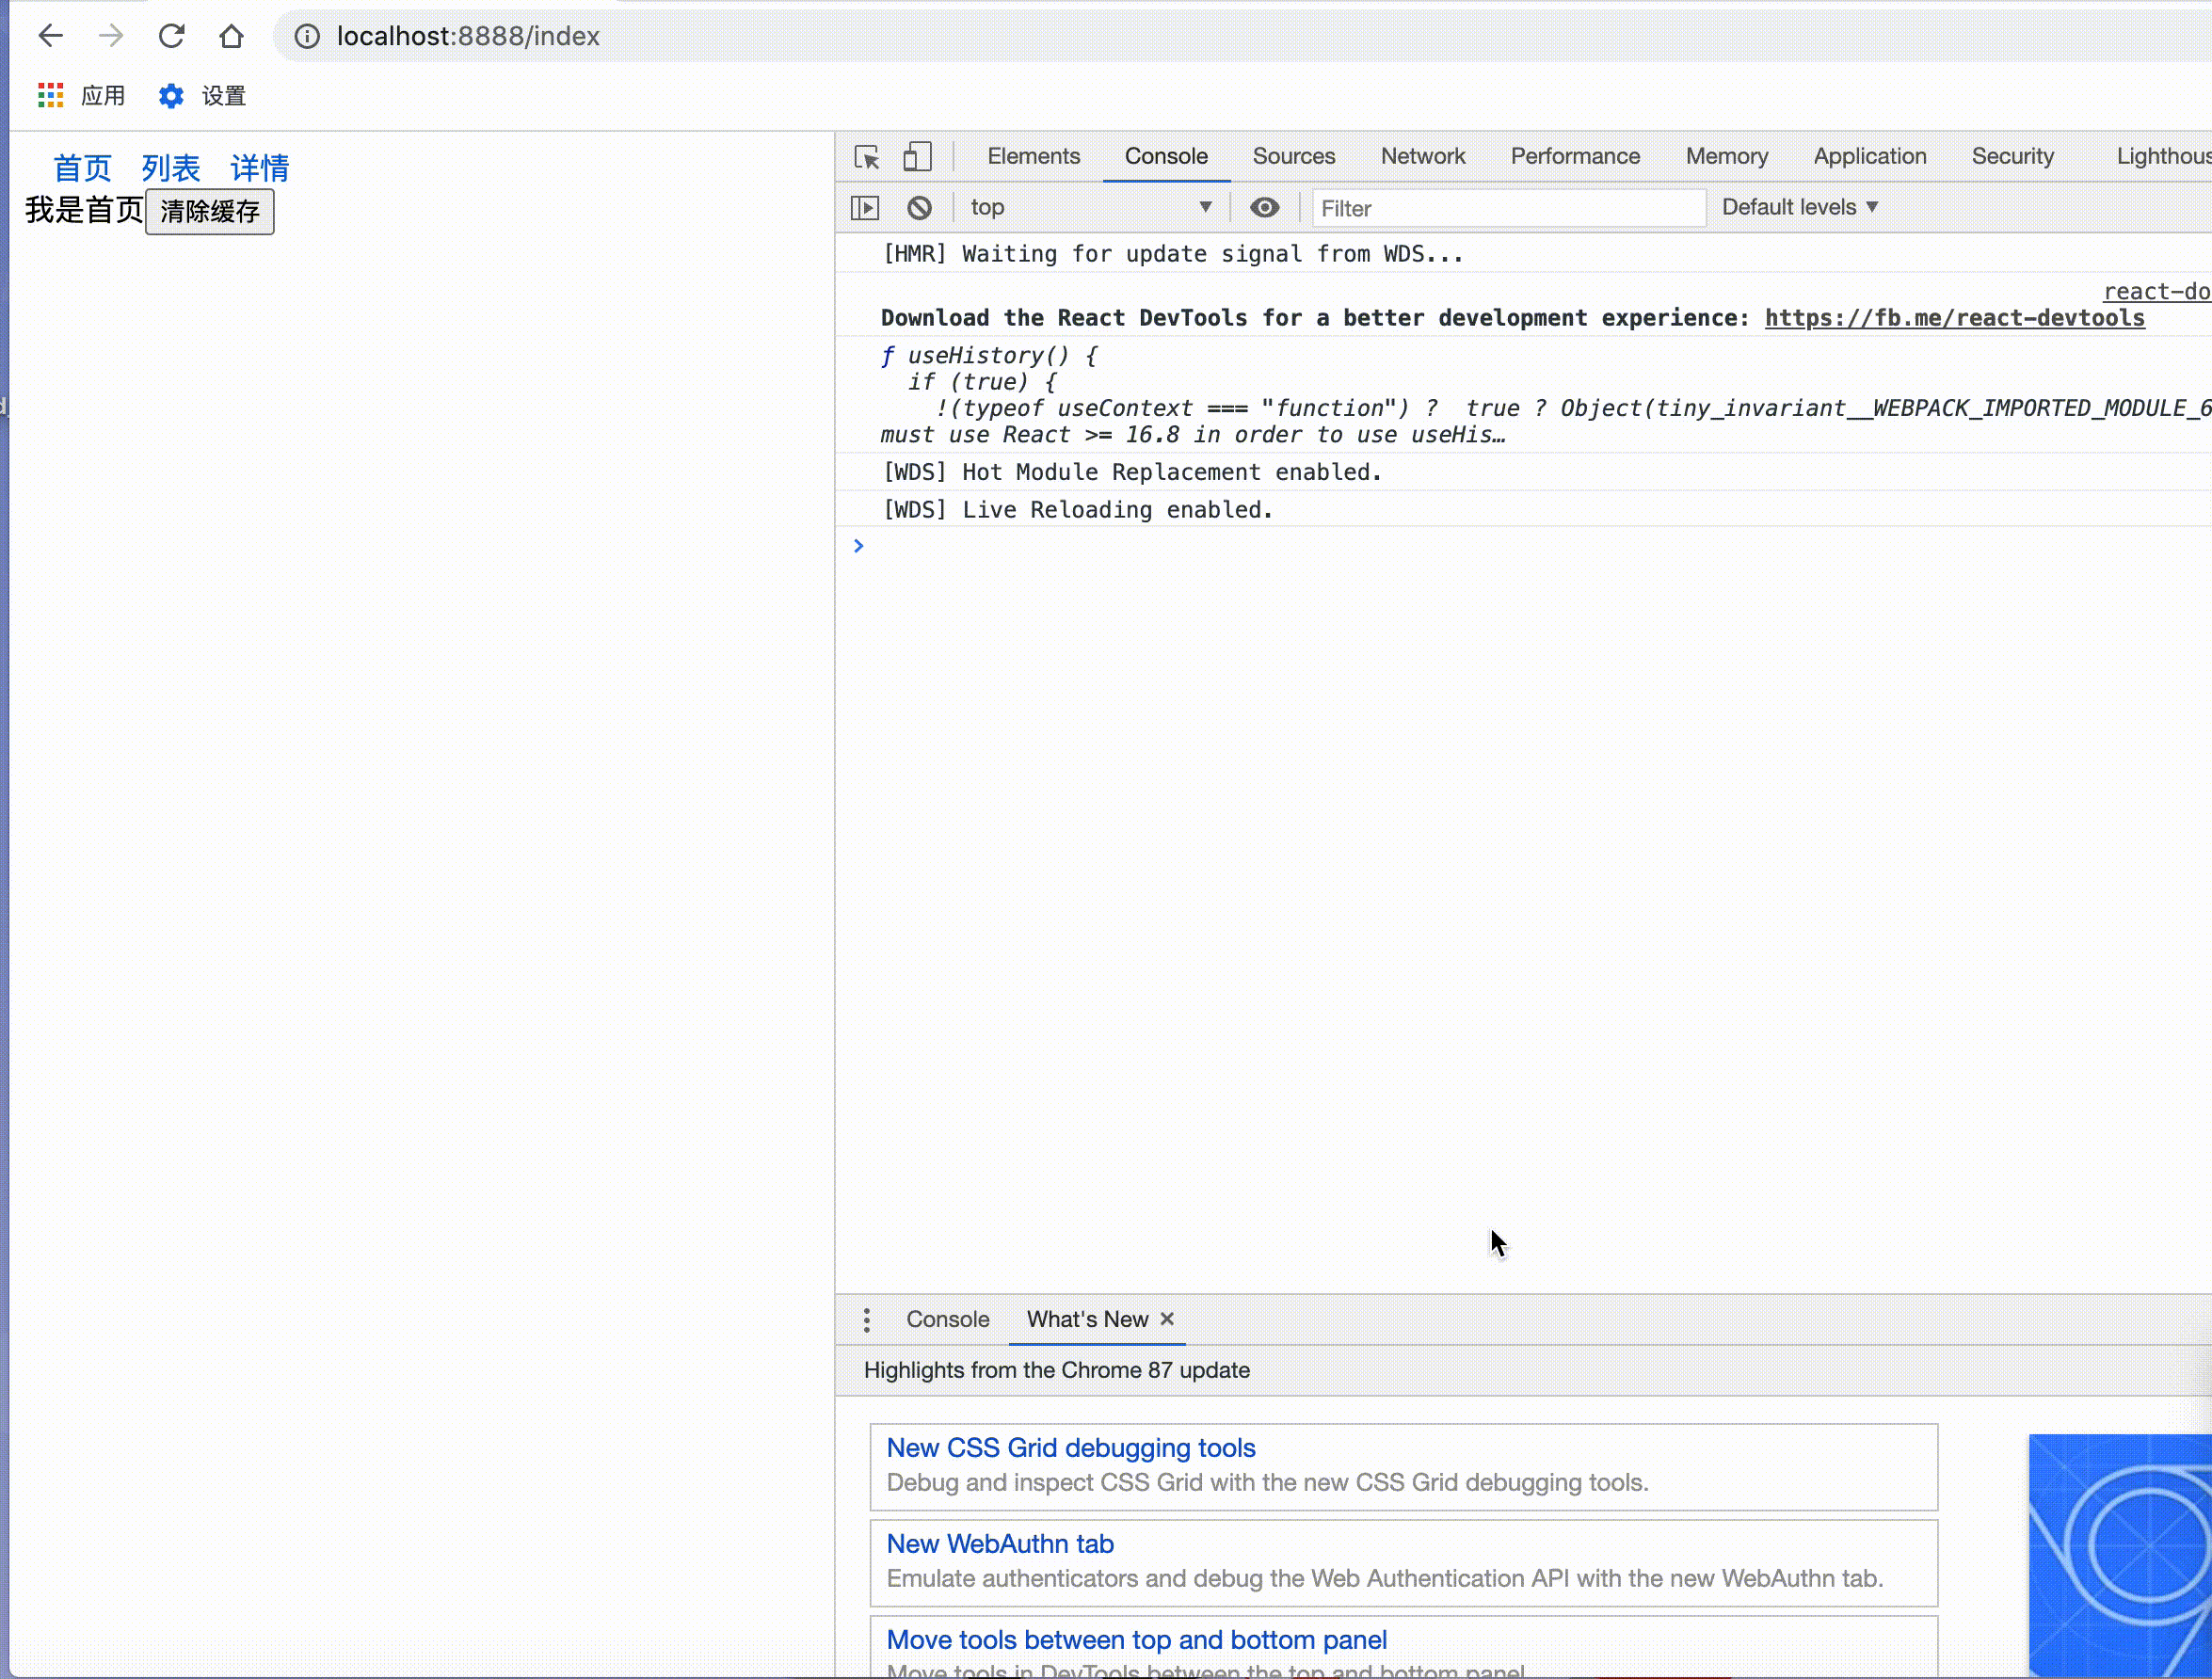
2 清除缓存缓存的组件,或是被route包裹的组件,会在props增加额外的方法cacheDispatch用来清除缓存。
如果props没有cacheDispatch方法,可以通过
import React from 'react' import { useCacheDispatch } from 'react-keepalive-router' function index(){ const cacheDispatch = useCacheDispatch() return <div>我是首页 <button onClick={()=> cacheDispatch({ type:'reset' }) } >清除缓存</button> </div> } export default index
1 清除所有缓存
cacheDispatch({ type:'reset' })
2 清除单个缓存
cacheDispatch({ type:'reset',payload:'cacheId' })
3 清除多个缓存
cacheDispatch({ type:'reset',payload:['cacheId1','cacheId2'] }) 3 缓存scroll ,增加缓存滚动条功能
如果我们想要缓存列表 scrollTop 的位置 ,我们可以在 KeepaliveRoute 动态添加 scroll 属性 ( 目前仅支持y轴 )。 为什么加入scroll,我们这里考虑到,只有在想要缓存scroll的y值的时候,才进行缓存,避免不必要的事件监听和内存开销。
<KeepaliveRoute path={'/list2'} component={List2} scroll />
效果

react-keepalive-router加入了全新的页面组件生命周期 actived 和 unActived, actived 作为缓存路由组件激活时候用,初始化的时候会默认执行一次 , unActived作为路由组件缓存完成后调用。但是生命周期需要用一个HOC组件keepaliveLifeCycle包裹。
使用:
import React from 'react' import { keepaliveLifeCycle } from 'react-keepalive-router' import './style.scss' @keepaliveLifeCycle class index extends React.Component<any,any>{ state={ activedNumber:0, unActivedNumber:0 } actived(){ this.setState({ activedNumber:this.state.activedNumber + 1 }) } unActived(){ this.setState({ unActivedNumber:this.state.unActivedNumber + 1 }) } render(){ const { activedNumber , unActivedNumber } = this.state return <div style={ { marginTop :'50px' } } > <div> 页面 actived 次数: { activedNumber } </div> <div> 页面 unActived 次数:{ unActivedNumber } </div> </div> } } export default index
效果:
这里注意的是 keepaliveLifeCycle 要是组件最近的 Hoc。
比如
装饰器模式下: 错误做法
@keepaliveLifeCycle @withStyles(styles) @withRouter class Index extends React.Componen{ }
正确做法
@withStyles(styles) @withRouter @keepaliveLifeCycle class Index extends React.Componen{ }
非装饰器模式下: 错误做法
class Index extends React.Componen{ } export default keepaliveLifeCycle( withRouter(Index) )
正确做法
class Index extends React.Componen{ } export default withRouter( keepaliveLifeCycle(Index) )
版权声明:
1、该文章(资料)来源于互联网公开信息,我方只是对该内容做点评,所分享的下载地址为原作者公开地址。2、网站不提供资料下载,如需下载请到原作者页面进行下载。
